Mobile usability testing is one of the best ways to increase the use, sales and success of your business by simply providing a better experience for your users.
For many it might seem like an incredibly hard thing to do. If you’re from the ones that find it hard and don’t know where to start, this post is the perfect starting point.
In this blog post we’ll explain you exactly what you need to run usability tests and what process to follow to achieve results.
But before we do so, let us explain you why you need to do it in first place.
Why Do You Need Mobile Usability Testing?
Many developers ask themselves why they should even bother with user testing. It is so much easier and faster if you just build your mobile app and let it be as it is.
This might be true but if you want to make your mobile app successful, you will need to perform user testing.
This is when it is no longer just optional but mandatory.
Benefits of Mobile Usability Test
Usability testing for mobile apps offers the following benefits.
Identify Bugs Faster
Mobile usability test before you release the app helps you find the bugs that your team might have missed during development.
That way you’d be able to fix them before the official release and as a result your users will be happier with using your app.
Improve Usability
This one is key because better usability and user experience will make your app more useful. This increases the chance of people using it coming back to it and using it more often.
Your end goal should be to make your mobile app intuitive and easy to use. Users should not think about how to perform certain tasks, it should come natural to them.
Related :
Improve Conversion & Sales
The side effect of improving your usability and natural flow of your app is an increase in conversions and sales. This should be the ultimate goal of your app.
Make it easy for people to find and buy what they’re looking for. Give the options to search and filter by the criterions that matter to them, not you.
Identify The Need Of New Features
Mobile app usability testing also helps you identify new features and functionalities for your app that you didn’t think about in the first place.
Your target audience might give your ideas for new ways to display your products, structure your content, filter products, etc. You can never know could they think of until you ask them.
Worth Reading :
What Do You Need For Mobile User Testing?
We will now talk about usability testing mobile apps hardware, software and other requirements.
Before you start with the user testing, it is good to make a list of the things you would need to do it in the first place.
Things might differ depending on the exact tests that you run but this is the general list you might want to use:
Mobile Usability Testing Camera
One of the biggest problems that you’d face with performing user tests on mobile is the recording of the screen.
On Desktop you have options such as Morae, Camtasia, or Ovo Studios that will do that for you but on mobile you are very limited.
Besides screen recording softwares, one of the preferred methods is simply recording the actions of the user with an external camera.
Although it’s possible to fix a regular camera on a tripod right above the mobile device, most mobile-usability researchers prefer either a webcam or a document camera because they usually come with software that allows real-time projection of the video footage on a computer screen:
Document Camera
These fixed cameras allows you to film the user while he’s testing your app. In this case the user must keep the device within the range of the camera.
The best way to do that is by keeping the device flat on the table, or by holding the phone in hands.
Document cameras are available in a wide range of cost and quality. You can find lower class brands like iPevo within the $69 – $139 range or high class like Elmo within the $258 – $615 range.
Better quality cameras have manual focus, a variety of image controls, and the ability to zoom in without substantially altering the quality of the image.
They also have an adjustable, preferably tall neck that allows a wide range of recording and is suited for both tablets and phones.
Webcam Or Mobile-device Cameras
These types of cameras are great for mobile- or tablet-screen recording. They are installed on a cradle where you also put your phone.
So when the user is holding the entire construction in order to use the phone. That way he can hold the device in the most comfortable position for him and the camera will always be recording the screen.
You have the option to build the cradle yourself by following on the many manuals online or to buy it online. You can also buy either the cradle only or the entire package – cradle plus camera.
When choosing your camera keep in mind that you’d probably need manual focus and zoom for best recording.
Microphone
If you want to be able to also record the user speaking, you’ll also need to provide him with a microphone.
In case that your camera is provided with one, you can simply use that one but for better quality audio we recommend you using a separate mike.
You can use a standard microphone for computer but we recommend you using a hands free device wireless lavalier. You can buy one from Amazon for just $6.55.
Software
Whatever camera or mike you use, you’d need a software to project it on the computer screen to allow the facilitator to follow the participant as he is working on the device.
Most cameras come with a ready software that you can use to do that. Once you have that live capture on your PC, you can record and broadcast the computer screen using software like Morae, Camtasia, Ovo, or even GotoMeeting and Webex.
You can also use the external-monitor port to project the video feed to an external monitor or projector for more people to see.
Some cameras come with their own video-recording software; if that is the case, you can skip the screen recording and use the camera software instead.
The disadvantage is that often these programs require more computing power than your regular screen-recording software.
Testing Environment
The room in which you perform that tests is often neglected as an important component of the process. You’d need to make a few adjustments to it to make it suitable for it.
First, you need to be able to control the light in the room. Preferably you’d want one without windows or with non-transparent blinds covering them. To avoid glare, turn off all lights above the testing device.
Use side table lamps instead.
You want to be able to control the brightness of the camera, and the monitor on which the recording device is projected. This is of essential importance for the quality of the video that you’ll receive at the end.
Internet connection is also an important element. In most cases, you’d like to test both cellular and Wi-Fi and to compare the differences.
The worse connectivity on cellular will give you an idea of how your app fares on a poor connection. With a good WiFi, you can focus on interface issues and how to user uses the app.
Since most mobile devices are used in an interruptible environments, you might want to add some additional noise when performing the tests. Experiment with nearby employee traffic and occasional noise to see how this will affect the experience of your testers.
Users
Who you choose as a tester is more important than everything else.
You want to test on users who are familiar with the device being used on. Don’t give an iOS device to an Android user so to speak because this will mess with you data. This user haven’t built habits with this device yet or might not even know how to use it.
When you screen participants, make sure you ask them what kind of devices they are using before to decide if they’re good fit for testers.
Testers also need to fit your user/buyer persona, otherwise it doesn’t make sense to recruit them in the first place.
Useful Resources :
- Best Mobile Conversion Optimization Tricks
- Smart Practices For Engaging & Retaining Mobile App Users
- Key Metrics For Measuring User Engagement For Ecommerce Apps
The Process of Running Mobile Usability Tests
Once you know why you need to perform user testing on mobile it’s time to actually learn how to do it. In the general this is the process that you should focus on:
Before you start user testing you need to be sure that you’re testing the right product with the right people. The best way to find out if this is true is to ask yourself the classic Five W’s (and one H) of journalism.
- Why are you running the test?
- Where will it take place?
- When will it take place?
- Who will be the test participants?
- What system (and what functionality) will you be testing?
- How will you collect and analyse data?
Answering these questions will give you direction for the test and you’d know exactly what would like to achieve.
Recruit Your Participants
When you’re about to choose your participants you should pay attention to 2 really important things.
They must be at the same time representative of the end user group or buyer persona but also they need to be users of the platform you’re testing as well.
Don’t test Android apps with iOS users since this will give you poor results. The same goes with testing on users that are not within your target market.
You Might Want To Read :
Develop The Tasks
User testing is all about asking people to perform realistic tasks and to observe with which ones they struggle. This will give you the answers you need to improve the app.
Remember that mobile is very different than desktop. Your computer you might user for hours but this is rarely the case with your mobile device.
People use their smartphones mostly when they are in a hurry and they want quickly to find the solution to their problem.
They might want to quickly check if your ecommerce site has better prices or if it sells the product they want to purchase.
Finalize Your Prototype
The user must be able to test the prototype in an environment he’s used to. Otherwise, he might feel quite uncomfortable and he’s reactions will be outside of his typical behavior.
The best option is to install the prototype on his phone and to test there. This will provide him with the greatest comfort.
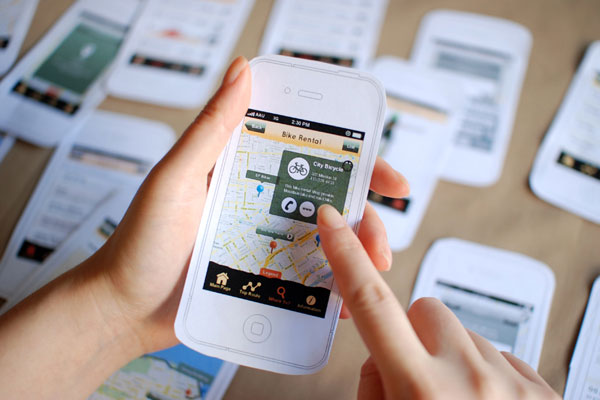
The app doesn’t need to be fully coded as well. You can use clickable PDF or use an iPhone app like POP (“Prototyping on Paper”) which allows you to take pictures of your sketches and then link them together for testing on the phone.
Setup The Testing Rig
One of the hardest things when performing user testing is to mirror the participant’s screen and place it on another one.
With an iPhone, you can use Airplay to display the screen of the iPhone on an Apple TV-enabled system, or you could hack together Reflector and Silverback. Unfortunately, there is no alternative software solution for other devices.
The simplest solution is just to record the person using the device with a camera as we already discussed.
Moderate The Test
moderation can be quite challenging because you need to be able to see the participant’s mobile device to do so.
Peeking over the tester’s shoulder can make him feel a bit uncomfortable and as a result probably he won’t use the device naturally. That’s why it’s better to have a remote monitor on which you can see what the user is doing on the screen.
Observe The Test
one of the quickest and most effective approaches to test observation is to ask someone else to do it for you.
Ask the design team to participate during the test and to take notes on usability issues they spot or any other interesting findings.
Analyze The Data
The end goal of running usability tests is to identify the main problem for which to create a solution. To do so you need to carefully analyze the data you’re gathering and come up with a way to identify the main issues.
One of the best ways to do this is by organizing the sticky notes from your design team on a board.
Remove everything that duplicate itself and ask the design team to identify the usability issues.
Also Read :
Improve The Design
When making changes in the design instead of thinking big, think small. What is the smallest change that you can make that will help you solve your usability issues?
This approach will help you solve your problem faster and cheaper. Also you will have more time to run more usability tests, identify and solve more issues.
Have you ran usability tests on your mobile app before? What kind of process did you follow? How did you go with improving the design? Let us know in the comments below.

